Install and use an app
Follow what a colleague does with a LabConstrictor app: install it on Windows or macOS, then open it in JupyterLab and, as experimental previews, in napari and Fiji. NucleiSky, a microscopy registration tool, is the example. This is an interactive preview: nothing is downloaded or installed, no analysis runs here, and every result was computed in advance from example data.
Curious how an app like this is made? See how an app is packaged
Your browser has downloaded the installer from the app's GitHub release.
Double-click the file to start the installer.
Windows protected your PC
Microsoft Defender SmartScreen prevented an unrecognized app from starting. Running this app might put your PC at risk.
Windows protected your PC
Microsoft Defender SmartScreen prevented an unrecognized app from starting. Running this app might put your PC at risk.
App: NucleiSky-0.1.1-Windows-x86_64.exe
Publisher: Unknown publisher
The installers are not code-signed yet, so Windows warns. Run it only if it came from the app's own GitHub release.

Welcome to NucleiSky 0.1.1 (64-bit) Setup
Setup will guide you through the installation of NucleiSky 0.1.1 (64-bit).
It is recommended that you close all other applications before starting Setup. This will make it possible to update relevant system files without having to reboot your computer.
Click Next to continue.
License Agreement
Please review the license terms before installing NucleiSky 0.1.1 (64-bit).

MIT License

Copyright (c) 2026 Cell Migration Lab

Permission is hereby granted, free of charge, to any person obtaining a copy
of this software and associated documentation files (the "Software"), to deal
in the Software without restriction, including without limitation the rights
to use, copy, modify, merge, publish, distribute, sublicense, and/or sell
copies of the Software, and to permit persons to whom the Software is
furnished to do so, subject to the following conditions:

The above copyright notice and this permission notice shall be included in all
copies or substantial portions of the Software.

THE SOFTWARE IS PROVIDED "AS IS", WITHOUT WARRANTY OF ANY KIND, EXPRESS OR
IMPLIED, INCLUDING BUT NOT LIMITED TO THE WARRANTIES OF MERCHANTABILITY,
FITNESS FOR A PARTICULAR PURPOSE AND NONINFRINGEMENT. IN NO EVENT SHALL THE
AUTHORS OR COPYRIGHT HOLDERS BE LIABLE FOR ANY CLAIM, DAMAGES OR OTHER
LIABILITY, WHETHER IN AN ACTION OF CONTRACT, TORT OR OTHERWISE, ARISING FROM,
OUT OF OR IN CONNECTION WITH THE SOFTWARE OR THE USE OR OTHER DEALINGS IN THE
SOFTWARE.
If you accept the terms of the agreement, click I Agree to continue. You must accept the agreement to install NucleiSky 0.1.1 (64-bit).
Select Installation Type
Please select the type of installation you would like to perform for NucleiSky.
Install for:
Choose Install Location
Choose the folder in which to install NucleiSky 0.1.1 (64-bit).
Setup will install NucleiSky 0.1.1 (64-bit) in the following folder. To install in a different folder, click Browse and select another folder. Click Next to continue.
Destination Folder
C:\Users\you\NucleiSkyBrowse...
The folder shown is an example.
Advanced Installation Options
Customize how NucleiSky integrates with Windows
Recommended. Recovers some disk space without harming functionality. (LabConstrictor turns the PATH and default-Python options off in construct.yaml, so they are not offered.)
Installing
Please wait while NucleiSky 0.1.1 (64-bit) is being installed.
A command prompt window opens during installation: this is normal, do not close it.
Post-install completed successfully.
Completing the NucleiSky 0.1.1 (64-bit) Setup
Thank you! You have successfully installed NucleiSky 0.1.1.
Click Finish to close Setup.
Your browser has downloaded the installer from the app’s GitHub release.
Double-click the file to start the installer. The file name ends in arm64: this installer is for Macs with an Apple silicon chip (M1 or later).
“NucleiSky-0.1.1-MacOSX-arm64.pkg” Not Opened
Apple could not verify “NucleiSky-0.1.1-MacOSX-arm64.pkg” is free of malware that may harm your Mac or compromise your privacy.
The installers are not code-signed, so macOS warns the first time. Open the file only if it came from the app’s own GitHub release.
Privacy & Security
Security
Allow applications fromApp Store & Known Developers
“NucleiSky-0.1.1-MacOSX-arm64.pkg” was blocked to protect your Mac.
Apple could not verify “NucleiSky-0.1.1-MacOSX-arm64.pkg” is free of malware that may harm your Mac or compromise your privacy.
Open the Apple menu, then System Settings, then Privacy & Security, and scroll down to Security. The Open Anyway button appears only after you tried to open the file once.
Open “NucleiSky-0.1.1-MacOSX-arm64.pkg”?
Apple is not able to verify that it is free from malware that could harm your Mac or compromise your privacy. Don’t open this unless you are certain it is from a trustworthy source.
- Introduction
- Read Me
- License
- Destination Select
- Installation Type
- Installation
- Summary
Welcome to the NucleiSky 0.1.1 Installer
You will be guided through the steps necessary to install this software.
- Introduction
- Read Me
- License
- Destination Select
- Installation Type
- Installation
- Summary
Important Information
To install to a different location, select "Change Install Location..." at the "Installation Type" phase, then choose "Install on a specific disk...", choose the disk you wish to install on, and click "Choose Folder...". The "Install for me only" option will install NucleiSky to the default location, ~/nucleisky.
The packages included in this installation are:
(the list of packages continues here in the real Installer)
- Introduction
- Read Me
- License
- Destination Select
- Installation Type
- Installation
- Summary
Software License Agreement
MIT License

Copyright (c) 2026 Cell Migration Lab

Permission is hereby granted, free of charge, to any person obtaining a copy
of this software and associated documentation files (the "Software"), to deal
in the Software without restriction, including without limitation the rights
to use, copy, modify, merge, publish, distribute, sublicense, and/or sell
copies of the Software, and to permit persons to whom the Software is
furnished to do so, subject to the following conditions:

The above copyright notice and this permission notice shall be included in all
copies or substantial portions of the Software.

THE SOFTWARE IS PROVIDED "AS IS", WITHOUT WARRANTY OF ANY KIND, EXPRESS OR
IMPLIED, INCLUDING BUT NOT LIMITED TO THE WARRANTIES OF MERCHANTABILITY,
FITNESS FOR A PARTICULAR PURPOSE AND NONINFRINGEMENT. IN NO EVENT SHALL THE
AUTHORS OR COPYRIGHT HOLDERS BE LIABLE FOR ANY CLAIM, DAMAGES OR OTHER
LIABILITY, WHETHER IN AN ACTION OF CONTRACT, TORT OR OTHERWISE, ARISING FROM,
OUT OF OR IN CONNECTION WITH THE SOFTWARE OR THE USE OR OTHER DEALINGS IN THE
SOFTWARE.
To continue installing the software you must agree to the terms of the software license agreement.
Click Agree to continue or click Disagree to cancel the installation and quit the Installer.
- Introduction
- Read Me
- License
- Destination Select
- Installation Type
- Installation
- Summary
Select a Destination
How do you want to install this software?
Installing this software requires about 1.3 GB of space.
You have chosen to install this software in your home folder. Only the current user will be able to use this software.
The choice of disk is not simulated: this preview always installs in the home folder.
- Introduction
- Read Me
- License
- Destination Select
- Installation Type
- Installation
- Summary
Standard Install on “Macintosh HD”
This will take about 1.3 GB of space on your computer.
Click Install to perform a standard installation of this software in your home folder. Only the current user of this computer will be able to use this software.
macOS may ask for your password or Touch ID when you click Install. Customize and Change Install Location are not simulated.
- Introduction
- Read Me
- License
- Destination Select
- Installation Type
- Installation
- Summary
Installing NucleiSky 0.1.1
Preparing for installation...Writing files...Installing packages...Running package scripts...
Install time remaining: Calculating...
The real installation can take a few minutes and the bar may pause while the package scripts run: do not close the Installer. The real Installer moves on to the summary by itself; here you click Continue.
- Introduction
- Read Me
- License
- Destination Select
- Installation Type
- Installation
- Summary
The installation was completed successfully.
Thank you! You have successfully installed NucleiSky 0.1.1.
Do you want to move the “NucleiSky 0.1.1” Installer to the Trash?
To keep this package in its current location, click Keep.
This prompt is optional. Moving the installer to the Trash does not uninstall the app.
Home › Applications
In Finder choose Go, then Home, then open the Applications folder. Look for the NucleiSky shortcut there. Double-click it to open the app.
On Linux you run the .sh file with bash in a terminal instead of opening an installer. Install guide for every system
Experimental preview. The NucleiSky tool shown here is not in the released NucleiSky app, which lists notebook support only; it exists on development branches. Expect bugs and changes. How the connection works ↓
NucleiSky is installed. Open it from the Start menu (Windows), the Applications folder (macOS) or your applications menu (Linux).
On a computer you double-click the icon. A terminal window opens and has to stay open while you work: it runs JupyterLab on your computer, and your browser is only its window. No analysis runs in this preview.
Welcome to NucleiSky!
How does it work?
This welcome notebook provides two main features:
1. Browse and Open Notebooks. Below is an interactive table with all available notebooks. Click any "Open the notebook" button to launch it in JupyterLab.
2. Check for Updates. Stay up to date with the latest notebook versions: the table compares your local notebooks with the latest versions on GitHub, and you can update any outdated one with a single click.
Run this cell to see the interactive notebook list
# Run this cell to see the interactive notebook list
from IPython.display import display, Markdown, HTML, Javascript, clear_output
from ipywidgets import widgets, GridspecLayout
from pathlib import Path
import requests, zipfile, json, yaml, sys
...  # (excerpt of the real cell)
How to read this page (a guide added for this demo, not part of the notebook)
- The table lists the notebooks that come with the app, with their local version.
- Status and Update? show whether a newer version of a notebook exists; Check for updates below compares with GitHub and updates a notebook with one click.
- Open the notebook opens a notebook in a new tab. Here, only NucleiSky2DApp is available: click its button to open the 2D notebook.
✅ The project version is up-to-date.
| Notebook Name | Description | Local Version | Status | Update? | Open Notebook |
|---|---|---|---|---|---|
| NucleiSky2DApp | Run NucleiSky2D as an app: align a partial view inside a large image from the constellation of its nuclei. | 0.1.0 | ✅ Up-to-date | - | |
| NucleiSky2DBenchmarking | Find the minimal number of nuclei needed to identify a patch in a large image. | 0.1.0 | ✅ Up-to-date | - | |
| NucleiSky2D_API_Workflow_Example | The 2D workflow written as plain Python calls. | 0.1.0 | ✅ Up-to-date | - | |
| NucleiSky3DApp | Run NucleiSky3D as an app. | 0.1.0 | ✅ Up-to-date | - | |
| NucleiSky3DBenchmarking | Find the minimal number of nuclei needed to identify a patch in a 3D image. | 0.1.0 | ✅ Up-to-date | - | |
| NucleiSky3D_API_Workflow_Example | The 3D workflow written as plain Python calls. | 0.1.0 | ✅ Up-to-date | - |
In this preview only NucleiSky2DApp opens; the descriptions were rewritten for this preview and the topic column is left out.
Check for updates (simplified for this preview: in the real notebook the version check runs when the cell runs, and a token field with a Load Private GitHub Repo button appears only for private repositories)
A token is only needed for private repositories. This preview never asks for one and sends nothing anywhere.
NucleiSky2D App
NucleiSky is a constellation-based registration framework that aligns microscopy images by matching the spatial arrangement of cell nuclei. It estimates a 2D similarity transform (rotation, uniform scale and translation) between images.
Step 0: Initialize Environment & Install Dependencies
Run the following cell to initialize the environment. In a local JupyterLab the notebook skips the installation steps, so your environment is left alone.
# @title Initialize Environment & Install Dependencies
# @title Initialize Environment & Install Dependencies
import sys
current_version = "0.1.0"
notebook_name = "NucleiSky2DApp"
...  # (excerpt of the real cell)
✅ Local environment detected. Assuming dependencies are already installed.
✅ Environment Ready
The real cell also prints one line about whether a GPU was found; it depends on the computer, so it is not shown here.
Step 1: Load your images and extract features
Run to load image choosing GUI
#@title Run to load image choosing GUI
display(widgets.HTML(STYLE_CSS))
...  # (excerpt of the real cell)
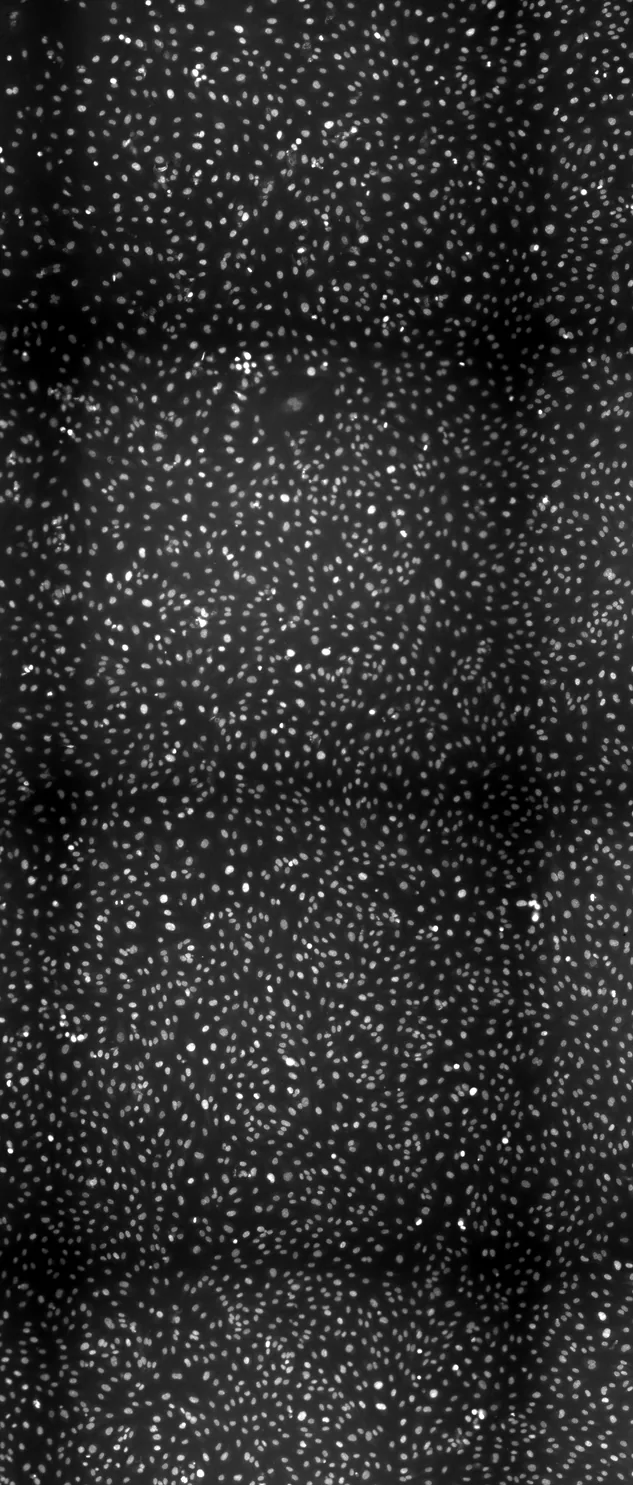
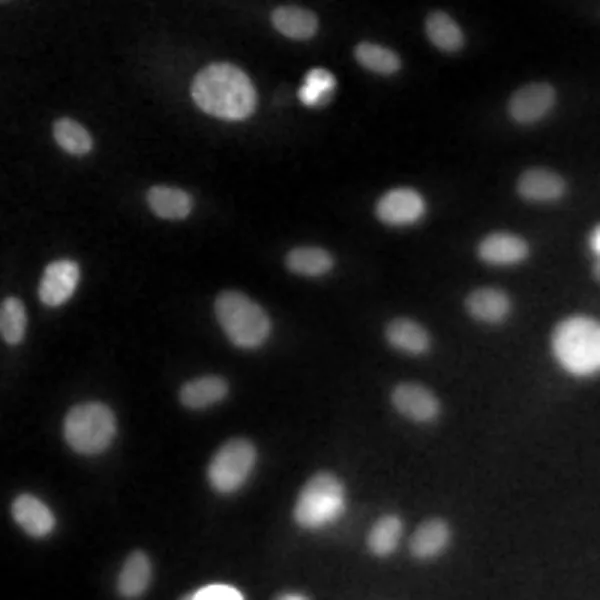
Choose Images and Output Folder
Select your reference image, define the crop region (from an image or randomly generated) and choose the output folder.
Source Images
Crop strategy
Full PathImage1.tif
Full µm/px1.3205
Crop Path/path/to/matching_crop.tif
This preview has no crop file to load. Choose Generate Random Crop: the recorded run used a random crop.
Random Generator Settings (default values)
Height (px) × Width (px)200 × 200
Max Angle (°)180
Zoom Min / Max0.7 / 1.3
These are the settings of the recorded crop. Changing them here does not generate a new crop.
Output Folder
Folder/path/to/output_folder
Load External Crop needs a crop file, which this preview does not have.
Loaded
Run to load the segmentation and feature extraction GUI
#@title Run to load the segmentation and feature extraction GUI
display(widgets.HTML(STYLE_CSS))
...  # (excerpt of the real cell)
Choose to apply segmentation or load existing masks
Segmentation Strategy
Standard deep learning model for cellular segmentation. Good general purpose choice.
High-speed pytorch implementation. Best for large datasets.
Classical computer vision. Fast, but requires high contrast and clean images.
Model Configuration
Thresholding Configuration
Mask Paths
Full Maskmasks_full_original_scale.tif
Crop Maskmasks_crop_original_scale.tif
Running a new segmentation is not available in this preview: the recorded example uses the supplied masks. Choose Load Existing Masks to continue. The methods and settings above are the notebook's own.
Result
✅ Extracted: Full=4387 nuclei, Crop=30 nuclei
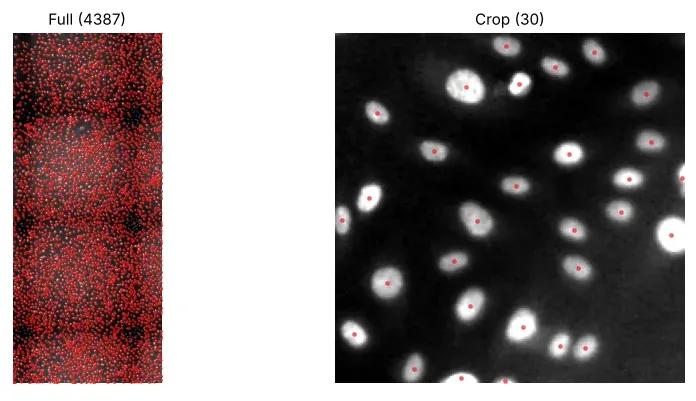
Drawn with the notebook's own plotting calls from the supplied masks.
Step 2: NucleiSky matching, Option A: Run NucleiSky2D Matching
The pipeline runs four pattern matching algorithms (Graph, Quad, Triangles and Geometric Hashing) one after the other. Keep Use default settings, or untick it to see the settings of each matcher.
Run NucleiSky2D
#@title Run NucleiSky2D
display(widgets.HTML(STYLE_CSS))
...  # (excerpt of the real cell)
Pipeline Overview
This step executes four pattern matching algorithms one after the other to find the crop location:
- Graph: Matches topology
- Quad & Triangles: Matches geometric constellations
- Hashing: Voting based on invariant coordinates
Configuration
Global thresholds for all matchers.
Topological matching using Delaunay triangulation edges.
Geometric hashing using 4-point constellations.
Geometric hashing using 3-point constellations.
Invariant voting system.
Running all four matchers is not available in this preview: the recorded example is the adaptive run of Option B below, so the settings shown here are for reading. The values are the defaults of the NucleiSky code.
Step 2: NucleiSky matching, Option B: Run Adaptive Matching
Run Adaptive 2D NucleiSky
#@title Run Adaptive 2D NucleiSky
display(widgets.HTML(STYLE_CSS))
...  # (excerpt of the real cell)
Adaptive Matching Strategy
This step runs a sequential cascade of matchers. It tries algorithms one by one using default settings until a valid transformation is found. The order of matchers is determined by the number of nuclei in the crop.
Configuration
Random Seed0
Export Margin (px)20
The recorded run used these defaults (time limit off). Other values are not computed in this preview.
Output (precomputed example)
Adaptive matching order policy: 20<=n_crop<1000 (['triangles', 'graph', 'quad', 'hashing'])
========== Matcher: Triangles ==========
Triangle-based matching failed.
========== Matcher: Graph ==========
RANSAC: # inliers = 6
Match quality:
  success        = False
  frac_inliers   = 0.067
  mean_error_um = 1.2776524841128292
========== Matcher: Quad ==========
Match quality:
  success        = True
  frac_inliers   = 0.867
  mean_error_um = 0.26405536314525246
✅ Adaptive matching completed and exported successfully.
Quality-control figure written by NucleiSky
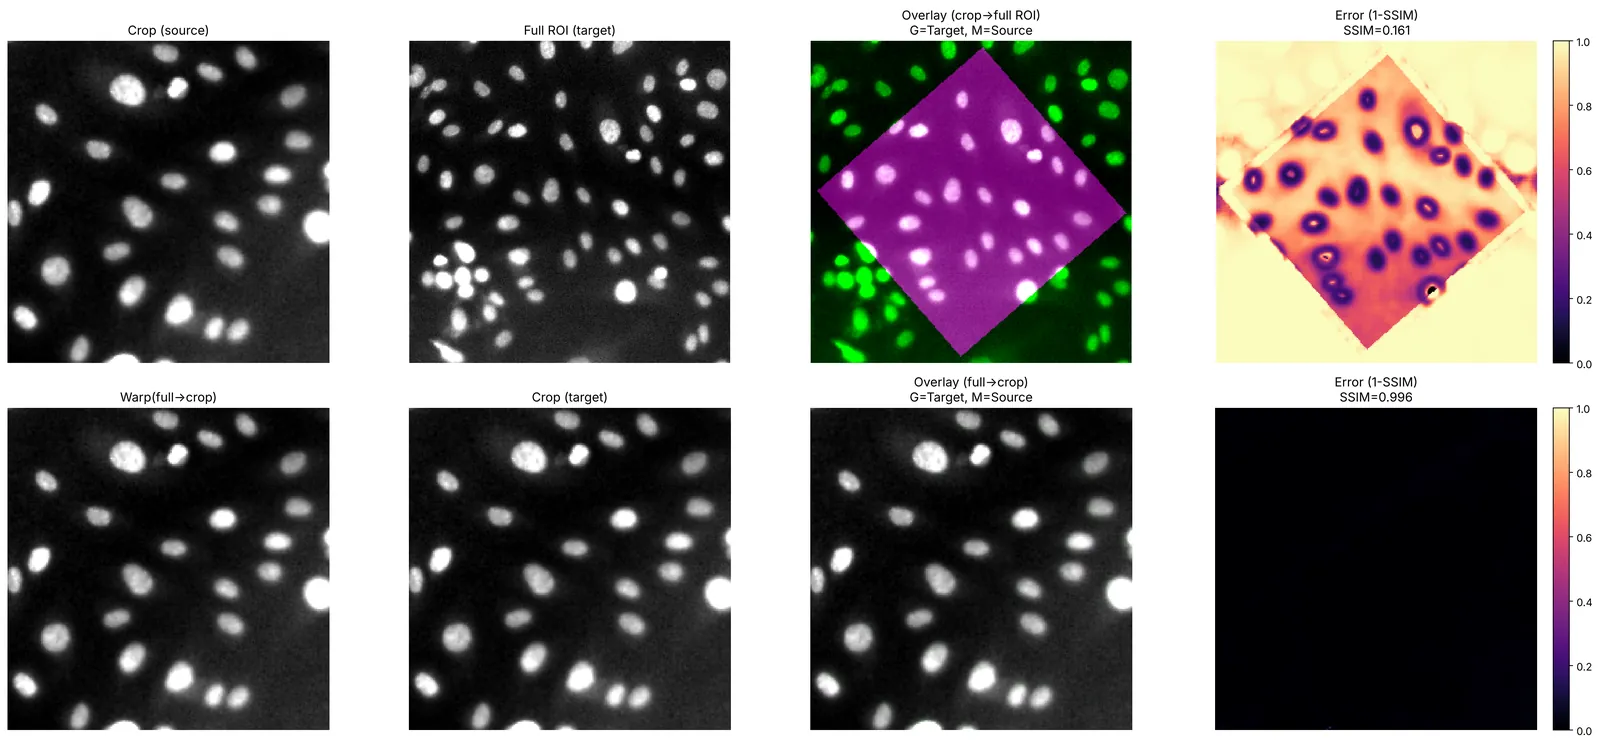
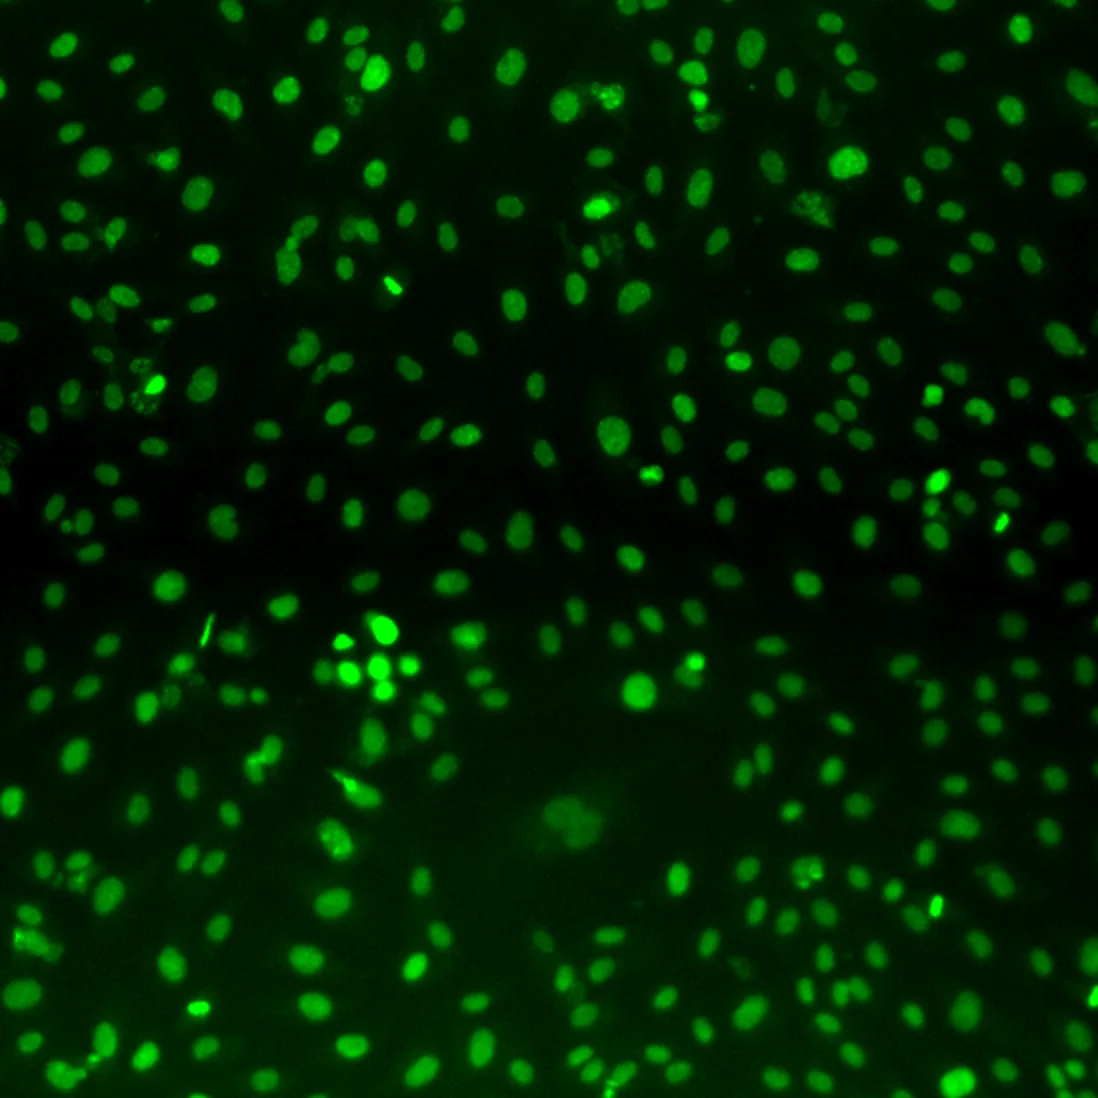
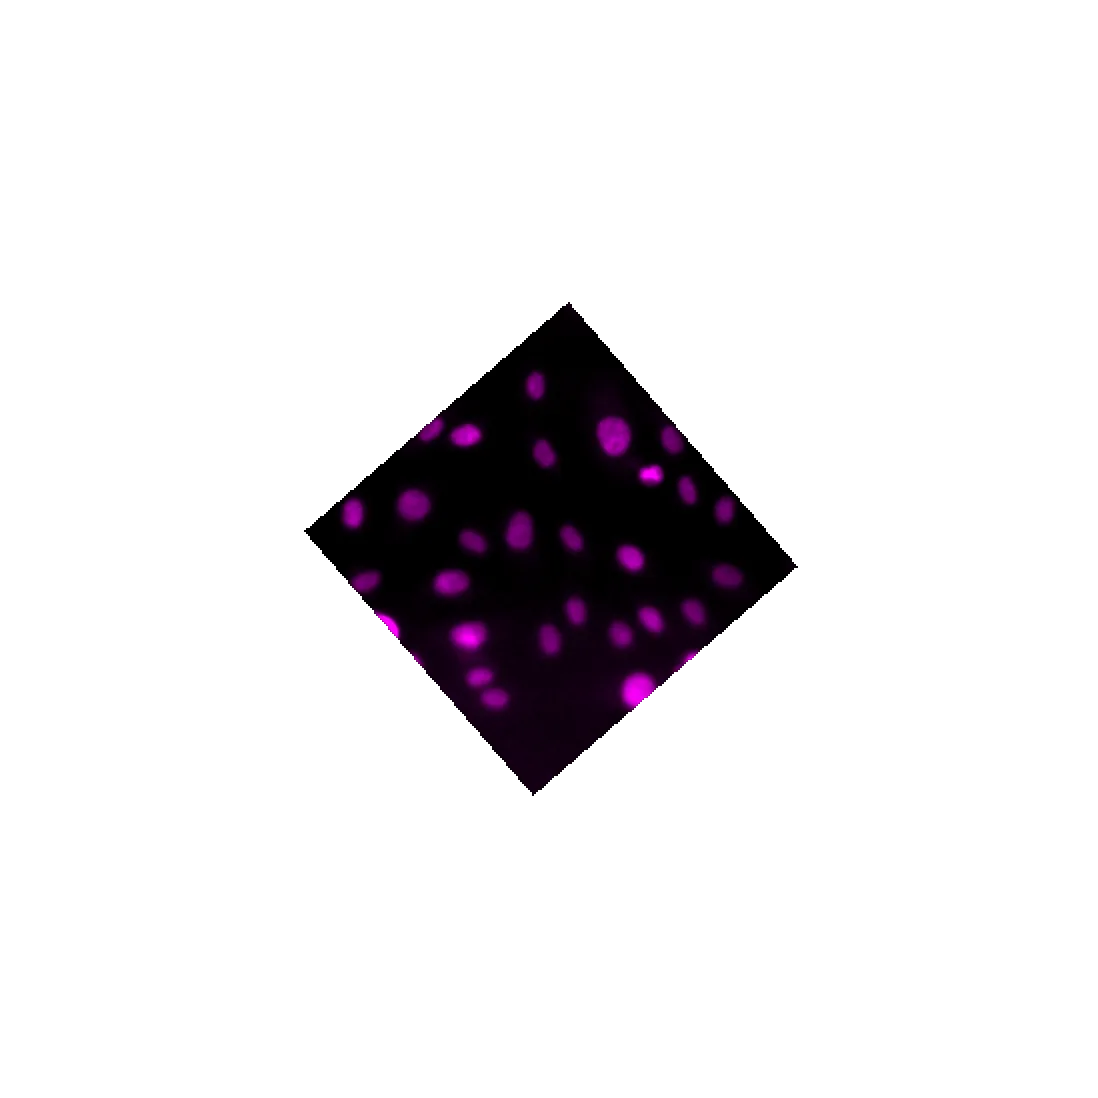
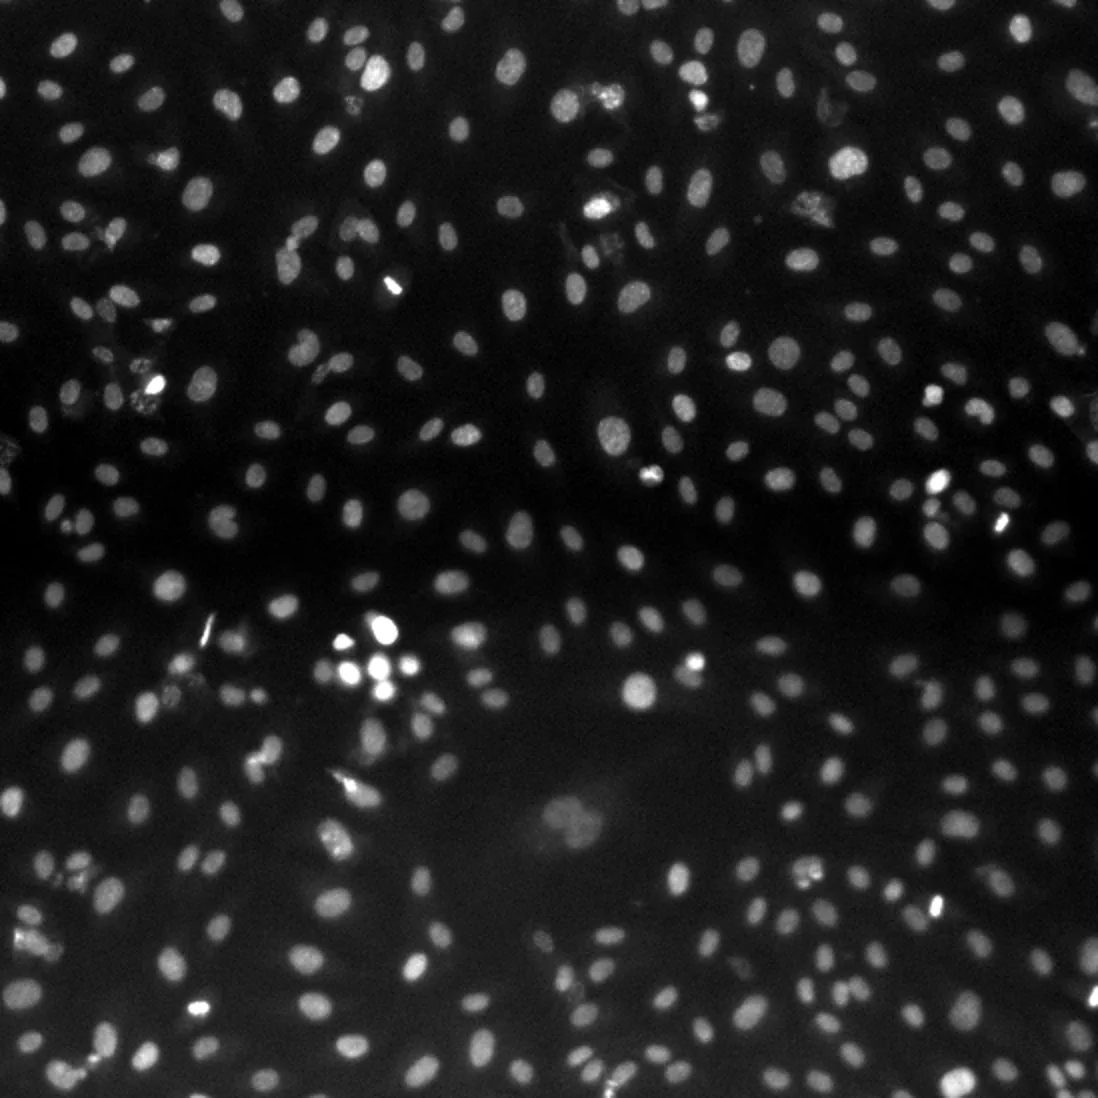
reference the small image after alignment where both agree; yellow outline: where the small image was found
- Matcher: quad
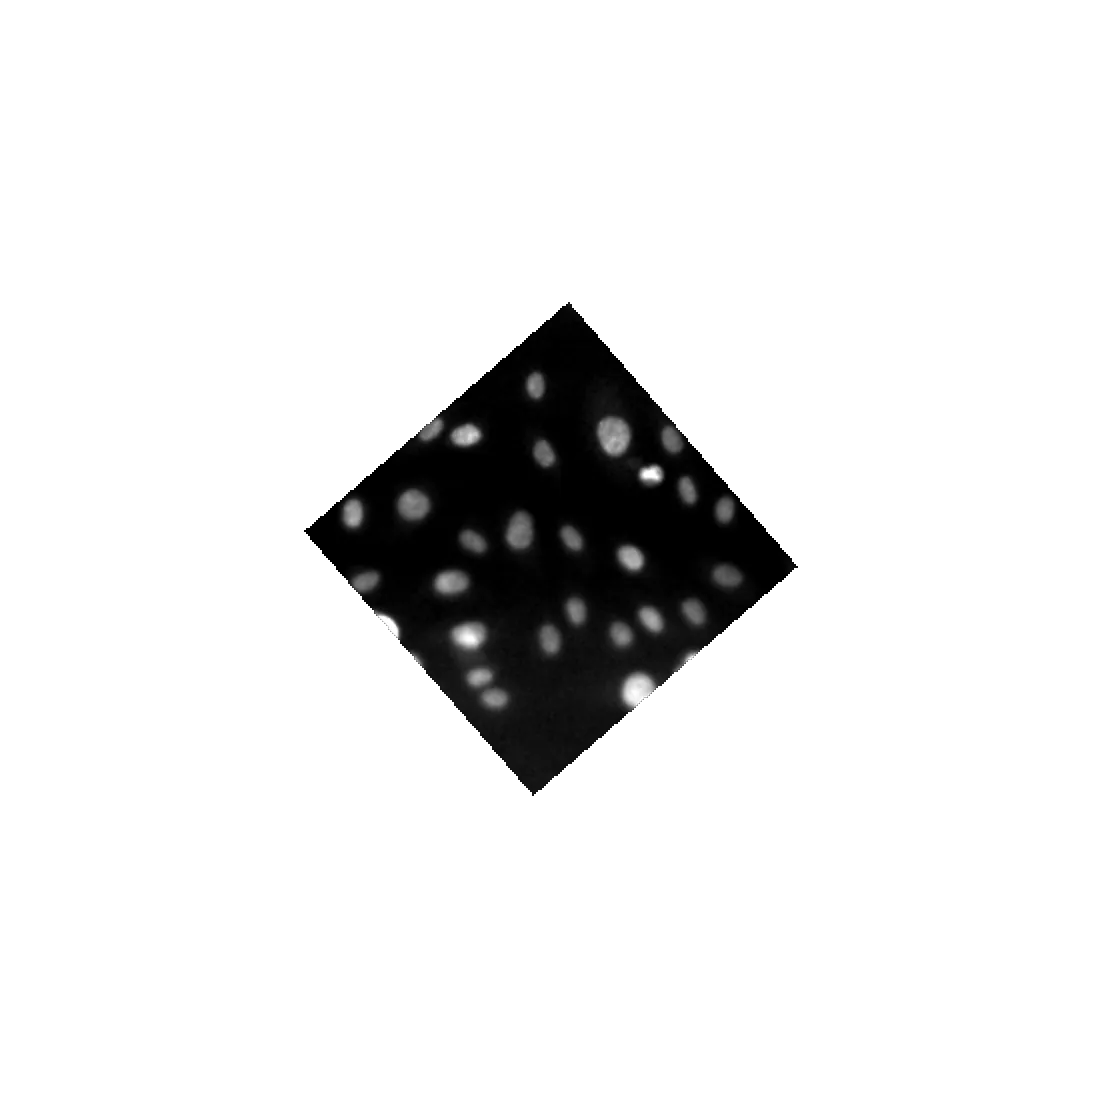
- Rotation: -49.1° in NucleiSky's sign convention (the small image is turned about 49° clockwise as drawn here); scale 0.9989
- 26 of 30 nuclei of the small image agree with the match; mean error 0.264 µm (summary written for this preview)
layer controls
opacity:
blending:additive
colormap:gray
Select a layer to change its opacity.
layer list
Zoomed to the region around the match.
LabConstrictor tools (LabConstrictor)
NucleiSky
Relocalize 2D
Find where a rotated / rescaled query image lies in a reference image.
Images
Referencereference
Queryquery
Reference pixel size um (um/px)1.3205
Query pixel size um (um/px)1.1622
Reference mask-----
Query mask-----
Matching
Matcherauto
idle
Simplified. Only Run, the layer list and the layer controls respond in this preview; the other fields are shown as in the real tool, for orientation. The result was computed offline from nucleus masks supplied with the data. In the real tool you would select those masks in the Reference mask and Query mask fields; with none selected the tool segments the images itself and the counts would differ.
reference.tif
1266 x 2970 pixels; 16-bit (region around the match shown)
query.tif
200 x 200 pixels; 16-bit
Alignment overlay (green = reference, magenta = query)
example result; the region around the match is shown
NucleiSky Relocalize 2D (precomputed example): [rotation_deg:-49.0732, scale:0.9989, n_nuclei_reference:4387, n_nuclei_query:30, matcher:quad]
Simplified. Only the link, OK and Cancel respond in this preview; the other fields are shown as in the real dialog, for orientation. The result was computed offline from nucleus masks supplied with the data (the mask fields above name them); with no mask the tool segments the images itself and the counts would differ.
How the connection works
Click a box or a step to see where it happens.
The same installed app, three programs
| Program | Where to find it | What happens |
|---|---|---|
| napari | Plugins > LabConstrictor tools | Results come back as layers, overlays and tables. Shown on this page. |
| Fiji | Plugins > LabConstrictor > LabConstrictor Tools... | Results come back as image windows, overlays and tables. Shown on this page. |
| QuPath | Extensions > LabConstrictor tools... | A prototype for QuPath 0.7. The image open in QuPath is exported for the tool, and points and outlines come back onto the slide. Not shown on this page. |
Each program has its own plugin, and all three run the same installed app. This website does not connect to a Fiji or napari running on your computer. Everything on this page is a simulation built from one precomputed result. LabConstrictor-Tools
About the example
This demo uses NucleiSky as its example. NucleiSky is an open-source tool that aligns microscopy images by matching the arrangement of cell nuclei, like stars in a constellation. It finds where a small image sits inside a large one and estimates the rotation, scale and shift. The small image here is a random crop generated from the large one, so the correct answer is known. NucleiSky is one app built with LabConstrictor; every app has its own notebooks. NucleiSky Open the NucleiSky page
Images: Dataset 1 from Hidalgo Cenalmor I. et al., Data associated with NucleiSky enables cross-scale multimodal registration of microscopy data using nuclei constellations (a tiled widefield image of a DAPI-stained HUVEC monolayer), Zenodo, licensed CC BY 4.0. Changes: contrast-stretched, enlarged and cropped; the small image is a software-generated crop that was rotated and rescaled; overlays computed by NucleiSky. Data: doi:10.5281/zenodo.20721416, CC BY 4.0. Method: NucleiSky, doi:10.1242/jcs.265152, NucleiSky. The result was computed offline with the released NucleiSky 2D code (method: the demo's README on GitHub).