Use notebooks after installation
After you install the desktop application, this guide will show you how to use the Jupyter notebooks that come with it.
1. Launching the Application
To open the application, go to the Start Menu on Windows or Linux, or the Applications folder on macOS. Search for the application name and click its icon to start it.
2. Welcome Notebook
When you start the application, a terminal will pop up.
Don't be scared by the terminal, it is normal: it keeps your Jupyter Lab session running. Do not close the terminal until you have finished working with your notebooks. When you have, stop the Jupyter Lab session with File > Shut Down in Jupyter Lab (or click on the terminal window and press
Ctrl+C). The terminal then asks you to pressEnter, and closes.
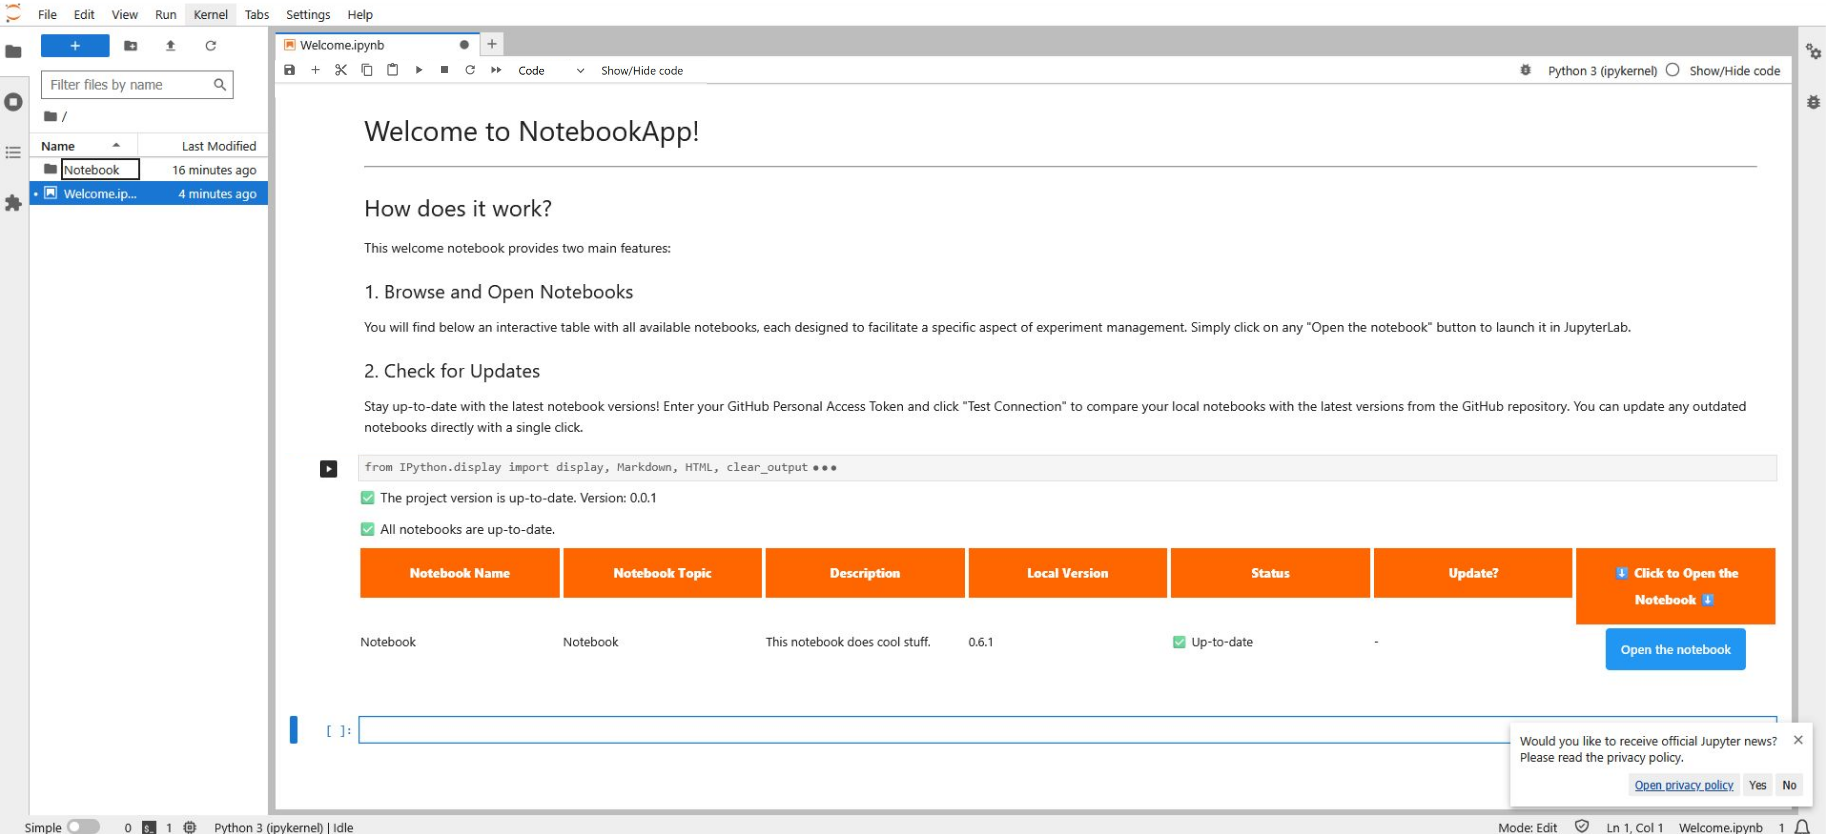
After some seconds, Jupyter Lab will open in your default web browser. The welcome notebook will appear automatically:
3. How to Run Notebooks?
You might be used to work with notebooks on JupyterLab (in case you need some guidance on JupyterLab check this guide). Still, LabConstrictor uses some features that can slightly change how you interact with notebooks. Please check this guide to understand how to run notebooks packaged with LabConstrictor.
4. Accessing your Notebooks
Once you run the welcome notebook, a dashboard will show a list of available notebooks. It looks similar to the screenshot in the Welcome Notebook step.
In the last column of the dashboard, you'll see a button called Open the notebook. Click it to open that notebook in a new tab and run it just like you did with the welcome notebook.