Generate a GitHub personal access token
Looking for the token used by the automatic template update workflow? Follow the dedicated automatic template synchronization guide. It uses a repository-scoped fine-grained token with a different purpose and secret name.
If you want to work with GitHub repositories from your notebook, like cloning, editing, or pushing files, you’ll need a GitHub Personal Access Token (PAT). This token lets you authenticate your API calls and gives you the right permissions. The GIF below shows the steps to create a token.
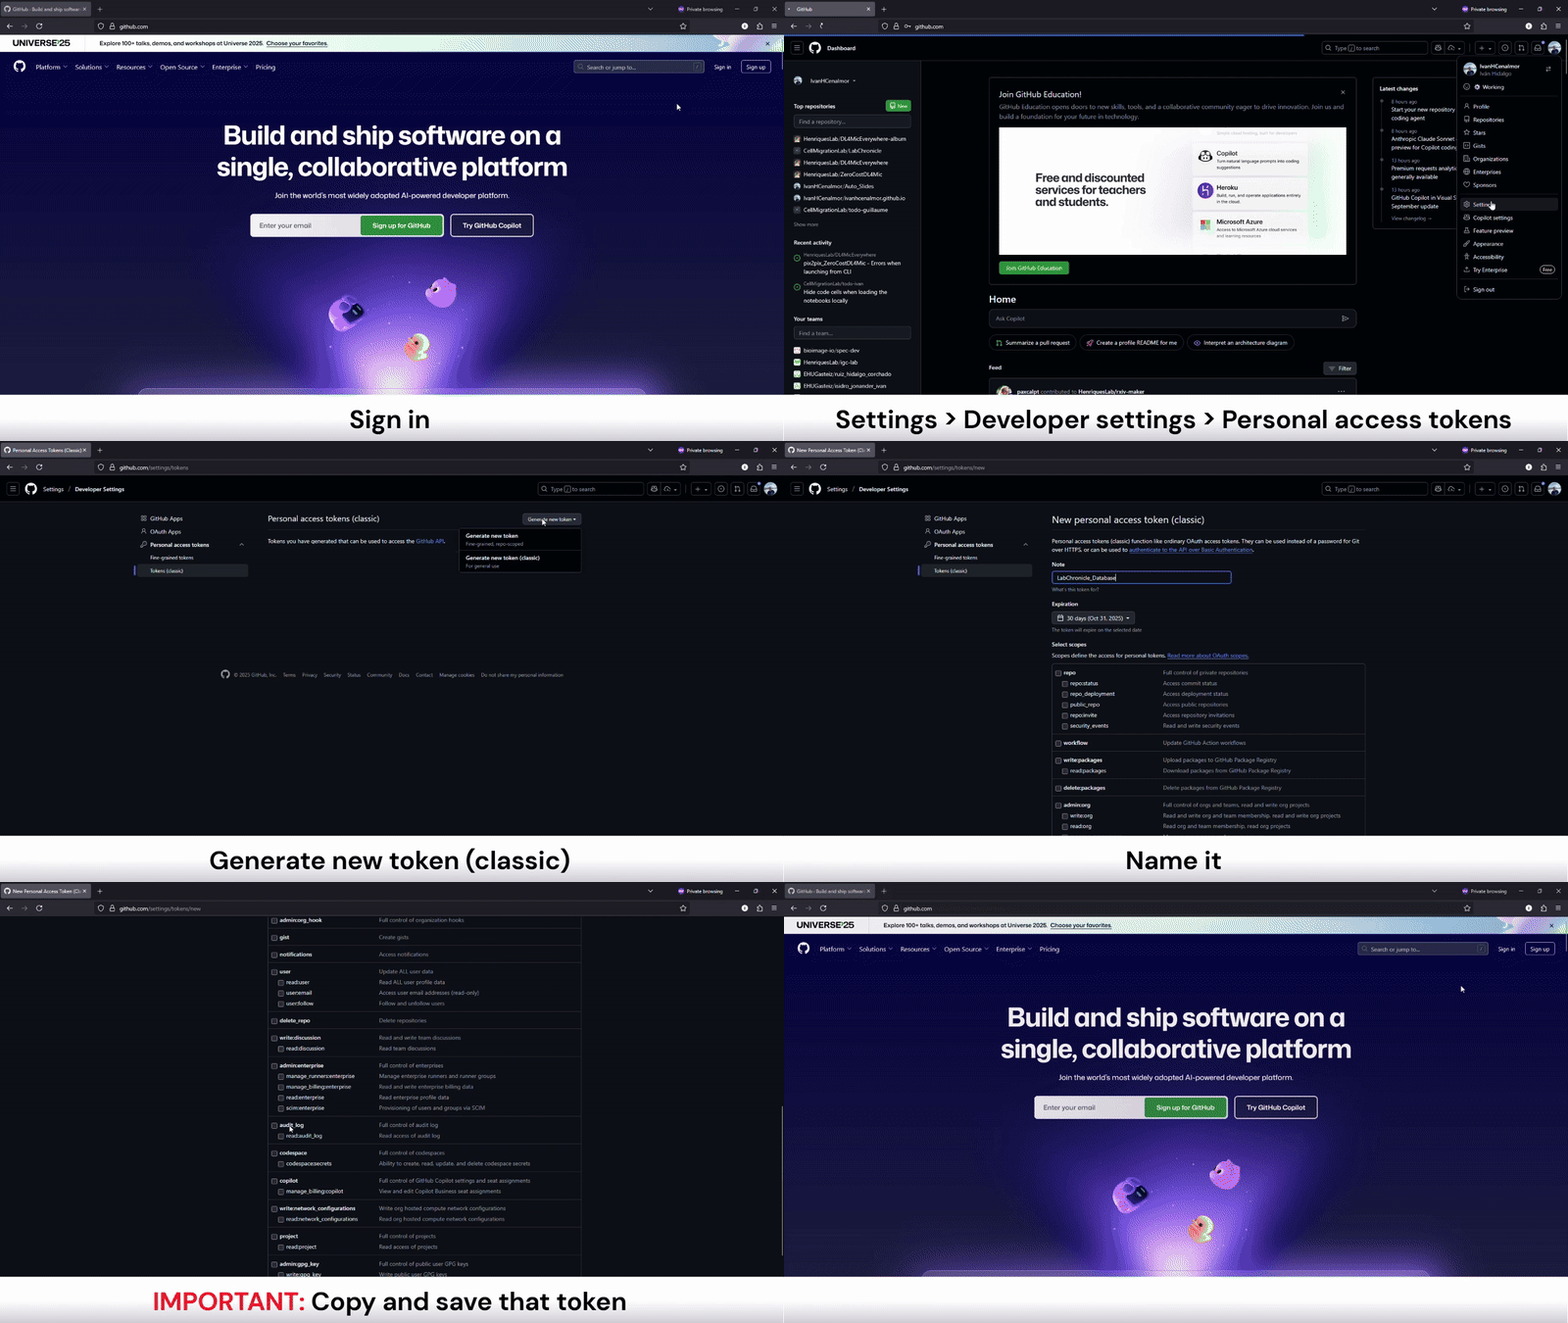
The LabConstrictor repository form accepts only a classic token, which starts with
ghp_. A fine-grained token (it starts withgithub_pat_) is rejected.
To see the full steps, follow the instructions below.
Create the token
- Go to https://github.com/ and sign in.
- Click your profile icon (top right) ➔ Settings
- In the left sidebar, select Developer settings ➔ Personal access tokens ➔ Tokens (classic)
- On the top right side (at the same level as
Personal access tokens (classic)), click on Generate new token ➔ Generate new token (classic) - Give your token a descriptive Name (e.g.,
Notebook RW Token) and set an Expiration if desired - Under Scopes, tick repo
- (Optional: To only work with public repositories, select public_repo instead of repo) - Click Generate token at the bottom
- Copy your new token right away. You won’t be able to see it again later!
- Paste the token into your notebook’s
GitHub-tokenfield, so API calls authenticate as the chosen owner.
A classic token with the repo scope can read and write your repositories, so keep it private.